Alright, fellow commanders of Age of Z! Ever found yourself staring at your vast roster of heroes, wondering which combination will truly turn the tide against those relentless zombies or crush your rivals in alliance wars?
Trust me, I’ve been there – countless times! It’s not just about having the strongest heroes; it’s about making them sing together, a symphony of destruction that can feel incredibly elusive.
The game’s meta is a constantly shifting beast, with new updates and hero releases always throwing a wrench into what we thought was the ‘perfect’ setup.
Just blindly deploying your most powerful units can lead to frustrating defeats and wasted resources, something none of us want, right? But what if you could take the guesswork out of it?
Through my own trial-and-error, countless hours spent poring over stats, and diving deep into community wisdom, I’ve come to appreciate the immense power of understanding hero synergies.
And with modern simulation tools becoming more sophisticated, we can now practically ‘test drive’ our hero teams before committing precious in-game resources.
This isn’t just theory; it’s about practical, game-winning strategies that can genuinely elevate your gameplay from ‘struggling survivor’ to ‘apocalypse conqueror’.
If you’re ready to unlock your heroes’ full potential and build truly unstoppable forces, then you’re in for a treat. Let’s accurately find out more!
Unlocking Your Squad’s True Potential: The Art of Synergy

Alright, fellow commanders, let’s get real for a moment. We all love those shiny, powerful heroes with their jaw-dropping stats, don’t we? It’s tempting to just slap your strongest five or ten together and call it a day, expecting to obliterate everything in your path. I know I’ve been guilty of it more times than I care to admit! But here’s the kicker: raw power, while important, often takes a backseat to something far more impactful – synergy. It’s that magical blend where your heroes don’t just exist side-by-side but actively boost each other, covering weaknesses and amplifying strengths to create a force far greater than the sum of its parts. Think of it like a well-oiled machine versus a collection of individual, disconnected gears. When your heroes truly click, their abilities interlock, creating devastating combos and an almost unbreakable defense that can truly turn the tide in those nail-biting battles, whether you’re fending off a zombie horde or going head-to-head with a rival alliance. This understanding has been a game-changer for me, transforming my frustrating defeats into exhilarating victories and allowing me to punch far above my weight class. It’s not just about who you have, but how you use them together, making every hero feel like a vital cog in your war machine. Honestly, it’s one of the most satisfying feelings in the game when you watch a perfectly synergized team just dismantle an opponent you thought was untouchable!
Understanding Core Hero Roles
Before we even think about combining heroes, we’ve got to get a solid grasp on what each hero actually does for the team. It sounds basic, but trust me, overlooking this is a rookie mistake that even seasoned players can fall into. You’ve got your tanks, those hulking beasts who soak up damage and protect your squishier allies. Then there are your damage dealers, often referred to as DPS (Damage Per Second) heroes, who are all about obliterating enemy health bars as quickly as possible. Don’t forget the supports – these are the unsung heroes who heal, buff your team, or debuff enemies, often making the biggest difference in protracted fights. And finally, we have your control heroes, who specialize in crowd control, stunning, silencing, or otherwise disrupting enemy formations. I remember early on, I’d just stack DPS heroes, thinking more damage equaled more wins. Boy, was I wrong! My team would get wiped out before they could even dish out their full potential. It wasn’t until I started thoughtfully incorporating tanks and supports that my survival rates, and consequently my win rates, skyrocketed. Each role is like a piece of a puzzle, and you need all the right pieces in the right places for the complete picture of victory.
Building Around Your Commander’s Strengths
Here’s a crucial insight that took me a while to fully appreciate: your commander isn’t just a static buff provider; they’re the lynchpin of your entire strategy! Every commander in Age of Z comes with unique skills and specializations that can heavily influence which heroes will perform best under their command. Are they a master of ranged combat, buffing all your artillery units? Or perhaps a defensive titan, making your frontline practically impenetrable? Maybe they’re focused on enhancing infantry or vehicle power. My advice? Don’t just pick your favorite heroes; pick heroes that truly align with and amplify your chosen commander’s inherent strengths. For instance, if your commander significantly boosts vehicle attack, it makes perfect sense to load up on your best vehicle heroes to create a truly formidable mechanized force. Conversely, trying to run an infantry-heavy team under a vehicle-focused commander is like trying to fit a square peg in a round hole – it just won’t be as efficient or powerful. I’ve personally seen my win rate jump dramatically just by adjusting my hero lineup to better complement my commander’s specific buffs. It’s about creating a harmonious ecosystem where every part of your army works in concert with the leader, turning your commander into not just a leader, but a force multiplier for your entire squad. It’s a subtle shift in perspective, but one that yields massive dividends on the battlefield.
Beyond Guesswork: The Power of Pre-Battle Simulation
Let’s be honest, we’ve all been there: staring at our hero roster, moving them around like chess pieces on a board, trying to envision how a new combination might perform. We deploy them, watch the battle unfold, and sometimes, it’s an exhilarating victory! More often, though, it’s a crushing defeat that leaves us scratching our heads and wondering where it all went wrong. The problem with pure trial-and-error in Age of Z is that it’s expensive! Every hero deployment, every lost battle, means wasted resources, precious time, and often, a hefty repair bill for your troops. Nobody wants to see their hard-earned progress vanish into thin air, right? This is where the magic of pre-battle simulation tools comes into play. For years, I relied on my gut feeling, and while it occasionally paid off, it was far from consistent. Once I started dipping my toes into dedicated simulation platforms, it felt like I’d unlocked a cheat code! These tools, often developed by dedicated community members or even integrated within some advanced game analytics sites, allow you to input your hero stats, equipment, and even enemy formations to predict outcomes without spending a single in-game resource. It’s like having a crystal ball for your battles, letting you fine-tune your strategies in a risk-free environment. This isn’t about taking the fun out of the game; it’s about making your gameplay smarter, more efficient, and ultimately, far more rewarding. It genuinely transforms the way you approach team building, allowing you to innovate and optimize your lineups with unprecedented confidence.
How Modern Tools Can Save Your Resources
Imagine being able to test out ten different hero configurations against a particularly tough zombie boss or a notorious PvP opponent, all without actually losing any troops or spending any stamina. That’s the core beauty of modern simulation tools. They’re essentially sophisticated calculators that take into account all the variables: hero levels, star ranks, skill levels, gear, commander buffs, and even the nuances of enemy lineups. The algorithms then run through thousands of scenarios, giving you a statistical probability of success and, crucially, showing you where your weaknesses lie. Before these tools became readily available, I distinctly remember pouring countless hours and resources into leveling up heroes, only to discover they didn’t quite click with my existing team during an actual battle. Talk about frustrating! Now, I can try out a speculative team, see its projected performance, identify bottlenecks, and then adjust my hero investment strategy accordingly. This means I’m only investing in heroes and upgrades that genuinely contribute to a winning combination, saving me untold amounts of time, speed-ups, and precious resource packs. It’s a significant shift from reactive spending to proactive, data-driven investment, and trust me, your in-game wallet will thank you for it!
Decoding Simulation Results for Real Gains
Okay, so you’ve run a simulation, and it spits out a bunch of numbers and percentages. What now? This is where your expertise as a commander truly shines. Don’t just look at the win/loss ratio; dive deeper! Look for patterns: which heroes consistently perform well in specific roles? Are there particular enemy types that always give your chosen lineup trouble? The most valuable aspect of these reports isn’t just the final score, but the granular data it provides. For example, if a simulation consistently shows your frontline collapsing too quickly, it’s a clear indicator that you need to either beef up your tanks, add more support/healing, or perhaps introduce a crowd-control hero to disrupt enemy damage dealers. I’ve often found that even a slight tweak, like swapping out one piece of gear on a key hero or redistributing a few skill points, can drastically alter the simulation’s outcome. It’s an iterative process, much like scientific experimentation. You hypothesize, you test, you analyze, and you refine. By diligently decoding these results, you transform abstract data into actionable strategies, allowing you to forge truly unbeatable combinations that are battle-tested even before they step onto the real battlefield. It’s like getting a peek at the future of your battles, and that’s an advantage you absolutely cannot afford to ignore.
My Top Hero Pairings That Just Work (And Why!)
After countless hours spent grinding, experimenting, and, yes, even losing spectacularly, I’ve stumbled upon some hero pairings that just consistently deliver. These aren’t just strong heroes slapped together; these are duos and trios that, in my experience, complement each other perfectly, creating a synergy that’s truly greater than the sum of their individual powers. I’ve used these combinations to smash through tough PvE challenges, dominate in arena skirmishes, and even hold my own against much stronger opponents in alliance wars. It’s about understanding their individual strengths and weaknesses and then finding that perfect partner who fills in the gaps or amplifies what they do best. When you get it right, it feels incredibly rewarding to watch your meticulously crafted team tear through enemy lines with precision and efficiency. These pairings aren’t set in stone, of course – the meta shifts, new heroes arrive, and your specific commander setup will always play a role – but these are solid foundations that have served me incredibly well time and time again. They’re my go-to choices for when the chips are down and I need a reliable, high-performing squad. I truly believe that integrating these kinds of synergistic pairings into your own strategy will elevate your game in ways you might not have thought possible.
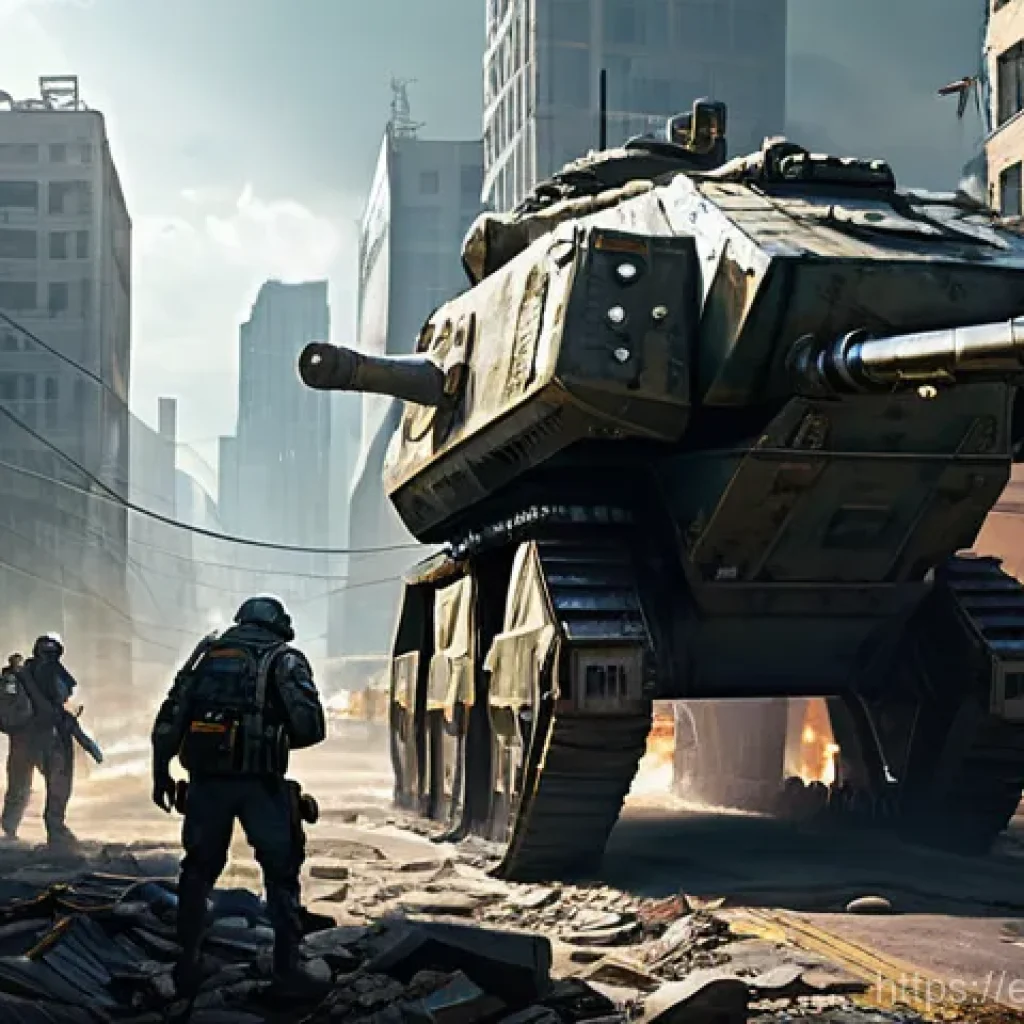
The Unbreakable Frontline Duo
Every formidable force needs an unyielding frontline, and let me tell you, I’ve found some pairs that are practically impenetrable. My personal favorite typically involves a high-HP, defense-focused tank like a fully geared Goliath, paired with a hero who provides incredible crowd control or healing. Imagine Goliath soaking up all that initial damage, while someone like Ghost or even a well-placed Medic is disrupting enemy attacks or patching up Goliath’s wounds. This isn’t just about having two strong heroes; it’s about their interaction. Goliath’s taunts draw aggro, buying time, and the support hero ensures he stays alive longer, effectively doubling his utility. I’ve seen this combo hold an entire enemy rush, giving my backline ample time to unleash their devastating attacks. Without that solid frontline, your squishy damage dealers will be fodder in seconds, no matter how powerful they are. Building an unbreakable wall is the first step to any successful strategy, and understanding which heroes can truly rely on each other to keep that wall standing is absolutely paramount. It provides the crucial breathing room your entire team needs to execute their roles effectively. My recommendation is always to invest heavily in this core duo; they’re the foundation upon which all your victories will be built.
Backline DPS Kings and Queens
Once your frontline is secure, it’s time for the fireworks! Your backline damage dealers are the engines of destruction, but just like with tanks, pairing them wisely can make all the difference. I love combining a hero with strong single-target burst damage, like a well-positioned Firefly, with another who provides area-of-effect (AoE) damage or applies critical debuffs, such as a high-level Death Hunter. While Firefly picks off key targets, Death Hunter softens up entire waves of enemies, creating a perfect storm of damage. This combination ensures that whether you’re facing a single formidable foe or a swarm of weaker enemies, your damage output is optimized. I’ve experimented with various combinations, and what I’ve learned is that pure AoE can sometimes lack the punch to take down high-priority targets quickly, and pure single-target can get overwhelmed by sheer numbers. The balance is key. Finding heroes whose damage profiles complement each other, allowing you to deal with diverse threats effectively, is a truly satisfying strategic puzzle. When they hit their stride, it’s like watching a symphony of destruction unfold, and the enemy simply melts away under their combined might. It’s absolutely exhilarating to witness!
Support Heroes: The Unsung MVPs
I cannot stress this enough: never underestimate your support heroes! They might not have the flashy damage numbers or the imposing presence of a tank, but they are often the true MVPs of any successful team. Heroes like Medic, Ghost, or even some of the more niche buff/debuff specialists can completely swing a battle in your favor. I remember one particularly brutal alliance war where my team was on the ropes. My frontline was cracking, and my DPS was struggling. Then, my Ghost unleashed a perfectly timed skill, silencing the enemy’s key damage dealers, while my Medic kept my Goliath just barely alive. That brief window was all my backline needed to recover and turn the tide, securing a stunning victory. It was a clear demonstration that raw power means nothing if your team can’t sustain itself or control the flow of battle. Integrating supports isn’t just about adding a healer; it’s about strategic placement and timing their abilities to maximize their impact. They are the glue that holds your entire formation together, and a well-played support can completely negate an enemy’s advantage. Trust me, investing in and truly understanding your support heroes will unlock a whole new level of tactical depth in your gameplay. They are the quiet giants of the battlefield!
Mastering the Meta: Evolving Your Combat Strategy
If there’s one constant in Age of Z, it’s change. The game is constantly evolving with new heroes, balance adjustments, and events that shake up what was once considered the “best” strategy. Relying on an outdated meta is a surefire way to find yourself falling behind, constantly losing battles you feel you should have won. It’s like trying to win a marathon with yesterday’s training methods when everyone else is using cutting-edge techniques. Believe me, I’ve seen it happen to myself and countless others. There’s nothing more frustrating than investing heavily in a hero combination only for a new update to render it less effective. That’s why being adaptable and proactive in understanding the current meta is absolutely crucial for long-term success. You can’t just set your team and forget it; you need to constantly observe, learn, and adjust. This vigilance isn’t just for the most competitive players; it’s for anyone who wants to consistently perform well and enjoy the game without constant frustration. The beauty of Age of Z lies in its dynamic nature, but that also means staying on your toes. It’s an ongoing process of learning and refinement, and honestly, that’s what keeps the game so engaging for me.
Spotting Emerging Trends in Age of Z
So, how do you stay ahead of the curve? It’s not about being a clairvoyant, but about being observant and tapping into the right communities. I spend a significant amount of time poring over official patch notes, checking out discussions on dedicated Age of Z forums, and watching content from top-tier streamers and YouTubers. They often have early insights or quickly identify powerful new hero interactions that emerge after an update. Pay close attention to which heroes are suddenly showing up more frequently in top-ranked PvP battles or are being used to clear the toughest new PvE content. Sometimes, a hero that was once considered niche suddenly becomes incredibly powerful due to a subtle buff or a synergy with a newly released hero. Another huge indicator is when you start losing to specific hero compositions repeatedly; that’s a clear sign something new and effective is making the rounds. Don’t be afraid to analyze your own battle logs to see what enemy setups are consistently giving you trouble. This proactive research is what separates the consistently winning commanders from those who are always playing catch-up. It’s about being a student of the game, always eager to learn and adapt to the ever-shifting landscape of the apocalypse.
Adapting Your Roster for Alliance Wars and PvE
This might seem obvious, but it’s a mistake I see players make all the time: using the exact same hero lineup for every single game mode. Alliance Wars are a completely different beast from tackling an elite zombie boss, and your hero roster needs to reflect that flexibility. In Alliance Wars, for instance, you might prioritize heroes with strong AoE damage or crowd control to disrupt large enemy formations, or robust defensive heroes to hold key positions. In contrast, for a single-target PvE boss, you’ll want heroes with high burst damage and sustain to chip away at a massive health pool. I keep several “preset” teams saved, each optimized for specific scenarios. For example, my “Boss Killer” team is loaded with single-target damage and debuffs, while my “Alliance Scraper” team focuses on area damage and survivability. Trying to use a single “all-rounder” team often means you’re not truly optimized for anything, leading to suboptimal performance across the board. The key is to understand the specific challenges of each game mode and then tailor your hero combinations to meet those challenges head-on. This strategic foresight allows you to maximize your efficiency and significantly increase your chances of success, no matter what Age of Z throws at you. It’s about being prepared for anything and everything!
Common Mistakes Even Veterans Make (and How to Avoid Them)

You’d think after playing Age of Z for a good while, we’d all be immune to certain mistakes, right? Wrong! Even seasoned veterans, myself included, can sometimes fall into familiar traps that hinder their progress and lead to unnecessary frustration. It’s often not about a lack of understanding, but rather a lapse in judgment or clinging to outdated beliefs about what works. I remember a phase where I was so convinced my “powerhouse” team was invincible, I refused to even consider alternatives, leading to a string of losses that really knocked me down a peg. It was a humbling experience, but one that taught me the importance of self-reflection and always questioning my own assumptions. Avoiding these common pitfalls isn’t just about getting better; it’s about maintaining a fresh perspective and ensuring you’re always playing at your peak, regardless of your experience level. It’s easy to get complacent, but the moment you do, the game has a funny way of reminding you that there’s always more to learn and optimize. Let’s dig into some of these classic blunders and how we can effectively steer clear of them to keep our game sharp and our victories flowing.
The Trap of “Highest Power” Teams
This is probably the most common mistake I see, and one I absolutely fell into myself early on. It’s the idea that simply deploying your heroes with the highest “power” score will automatically lead to victory. On paper, it sounds logical, right? More power equals stronger team! But in reality, it’s a massive oversimplification that completely ignores the crucial role of synergy, roles, and counters. I’ve gone into battles with a team whose combined power far exceeded my opponent’s, only to be absolutely decimated because my heroes had no cohesion. Maybe I had three DPS heroes but no tank, or too many supports and not enough damage. The “power” number is just that – a number. It doesn’t account for how well your heroes interact, if their skills complement each other, or if they effectively counter the enemy’s composition. Relying solely on power is like buying a bunch of expensive, high-performance car parts and expecting them to automatically form a winning race car without any careful assembly or tuning. It just doesn’t work that way. Always prioritize synergy, role balance, and strategic counters over raw power. A well-constructed, lower-power team will almost always outperform a high-power, chaotic mess. It’s a bitter pill to swallow when you realize your “strongest” heroes are actually holding you back, but it’s a vital lesson for true mastery.
Ignoring Faction Bonuses at Your Peril
Here’s another subtle but potent mistake: overlooking faction bonuses. Every hero in Age of Z belongs to a specific faction, and often, deploying multiple heroes from the same faction can unlock powerful team-wide buffs. These bonuses can range from increased attack or defense to faster skill regeneration or even special effects. Ignoring these free boosts is like leaving money on the table – why would you do it? I used to pick heroes purely based on their individual merits, completely disregarding their faction alignments. It wasn’t until I started experimenting with faction-aligned teams that I realized the incredible boost these bonuses provide. Sometimes, a slightly weaker hero, when paired with others from their faction, can contribute far more to the overall team’s effectiveness than a standalone, higher-tier hero who doesn’t receive any bonus. It requires a bit more strategic planning during your team construction, but the payoff is substantial. Keep an eye on the specific bonuses offered by each faction and try to incorporate them into your team compositions whenever possible. It’s often the difference between a good team and a great one, transforming a seemingly average lineup into a formidable force. It’s a little detail, but trust me, these details often decide the outcome of the most crucial battles!
Maximizing Your Return: Smart Resource Allocation
Let’s face it, resources in Age of Z are precious commodities. Whether it’s experience books, skill manuals, gear materials, or just good old iron and food, every single unit counts. We’re constantly bombarded with options on where to spend them, and it’s incredibly easy to make suboptimal choices that slow down your progress and leave you feeling like you’re constantly running on empty. I’ve been there, throwing resources at every new hero I acquired, only to spread myself too thin and end up with a roster of mediocre units instead of a few truly dominant ones. It was a tough lesson, realizing that more heroes don’t necessarily equate to a stronger overall force. The key to long-term success isn’t just about accumulating resources; it’s about allocating them intelligently, ensuring every investment yields the maximum possible return. This means prioritizing, strategizing, and sometimes, making the tough decision to hold back on certain upgrades for the greater good of your overall strategy. It’s a mindset shift from impulsive spending to thoughtful investment, and it directly impacts your ability to compete at higher levels without constantly feeling resource-starved. Truly, smart resource management is a game in itself, and mastering it is crucial for anyone aiming for the top.
Prioritizing Key Hero Upgrades
So, with a limited pool of resources, how do you decide who gets the goodies? My golden rule is to focus on your core synergy team first. Identify the 5-7 heroes who form the backbone of your primary offensive and defensive lineups, and pour the vast majority of your resources into them. This means maxing out their levels, upgrading their key skills, and equipping them with the best possible gear. Don’t fall into the trap of trying to level up every hero you own simultaneously. A few maxed-out, synergistic heroes will perform exponentially better than a dozen moderately leveled ones. I learned this the hard way, spreading my precious skill books across too many heroes and ending up with no one truly exceptional. Instead, hone in on those heroes who directly contribute to your main strategies. If you’re running a vehicle-heavy commander, those vehicle heroes should get priority. If your strategy revolves around a specific tank and healer combo, ensure they are as robust as possible. This focused approach ensures that your primary combat forces are always at their absolute peak, allowing you to tackle tougher challenges and secure more consistent victories. It’s about building a sharp spearhead rather than a dull, wide net.
When to Invest in New Recruits
It’s always exciting when a new hero drops or you finally unlock that elusive legendary character! The temptation to immediately pour all your resources into them is immense, but often, it’s a decision that needs careful consideration. My advice? Don’t rush into upgrading every new recruit. First, evaluate how they fit into your existing synergistic teams. Do they replace an existing core hero and offer a significant upgrade, or do they enable an entirely new, powerful strategy? If the answer is yes, then by all means, make the investment. However, if they’re just a marginal improvement or don’t quite fit your current top-tier compositions, it might be wiser to hold back. Sometimes, it’s better to keep those resources in reserve, patiently waiting for a hero who truly complements your existing setup or an undeniable game-changer. I’ve seen players drain their entire resource reserves on a shiny new hero, only to realize they don’t have the materials to level up their supporting cast, thus weakening their overall team. Patience is a virtue in Age of Z. Strategically investing in new recruits means understanding their long-term value to your overall force, not just their initial hype. It’s about calculated growth, not impulsive spending, and it will save you a lot of regret down the line.
| Hero Pairing Example | Primary Role(s) | Key Synergy Benefit | Strategic Application |
|---|---|---|---|
| Goliath + Ghost | Tank / Crowd Control | Goliath draws aggro, Ghost silences key enemies, maintaining frontline integrity and disrupting enemy damage. | Alliance Wars, Strong PvE Bosses, protecting backline DPS. |
| Firefly + Death Hunter | Single-Target DPS / AoE DPS & Debuffs | Firefly eliminates high-priority targets quickly, while Death Hunter softens entire waves and applies critical debuffs, ensuring balanced damage output. | General PvE (especially zombie waves), PvP offense, clearing stages. |
| Seraph + Medic | Healer / Support & Burst Damage | Seraph provides crucial healing and occasional burst, while Medic offers sustained healing and cleanses debuffs, keeping the team alive through prolonged engagements. | Survival Mode, Alliance Defense, any long battle requiring sustain. |
| Wasteland Warrior + Rocket | Vehicle Tank / Vehicle AoE DPS | Wasteland Warrior absorbs damage and buffs vehicle allies, Rocket deals massive area damage, creating a powerful mechanized assault team. | Vehicle-focused formations, pushing enemy lines, destroying structures. |
My Personal Journey: From Trial and Error to Triumph
You know, looking back at my early days in Age of Z, it feels like I was stumbling around in the dark, constantly making mistakes and often feeling overwhelmed. I’d watch other commanders effortlessly wipe out opponents or clear events that felt impossible to me, and I’d wonder what magic they possessed. It wasn’t magic, of course; it was understanding the mechanics, the nuances, and crucially, the power of intelligent hero management. My journey hasn’t been a straight path to victory; it’s been paved with countless defeats, wasted resources, and moments of sheer frustration where I almost threw my phone across the room! But every single one of those setbacks taught me something invaluable. It’s those hard-won lessons, learned through painful trial and error, that have truly shaped my understanding of the game and allowed me to evolve from a struggling survivor into a commander who can confidently tackle almost any challenge. This game demands persistence and a willingness to learn from your mistakes, and once you embrace that mindset, the growth you experience is incredibly rewarding. It’s not just about winning; it’s about the journey of becoming a better, smarter player.
Lessons Learned from Epic Fails
Oh, the epic fails! Where do I even begin? There was the time I invested heavily in a hero that looked amazing on paper but had absolutely no synergy with my commander or existing team. Result? A huge resource drain for minimal gain. Then there was the phase where I ignored defensive heroes entirely, thinking “offense is the best defense,” only to watch my damage dealers get instantly melted in every major battle. The biggest lesson I’ve learned from these blunders is that balance is paramount, and gut feelings can be very misleading. I also vividly remember neglecting a specific hero’s skill upgrades, only to realize later that a maxed-out skill could turn them into an absolute game-changer. These aren’t just minor missteps; these were significant setbacks that cost me valuable time and resources. But here’s the thing: each fail was a crucial learning experience. It forced me to re-evaluate my strategies, dig deeper into hero mechanics, and pay closer attention to community wisdom. Now, when I encounter a tough challenge, instead of getting frustrated, I see it as an opportunity to analyze, adjust, and come back stronger. It’s about embracing the learning process, even when it stings a little.
The Joy of a Perfectly Executed Strategy
While the failures taught me resilience, it’s the triumphs that fuel my passion for Age of Z. There’s truly nothing quite like the feeling of meticulously planning a hero composition, running simulations, making those crucial upgrades, and then watching your perfectly executed strategy unfold in a live battle. Whether it’s seeing your frontline hold against an overwhelming assault, your backline DPS melt through a fortified enemy, or a perfectly timed support skill turning the tide, those moments are pure gold. I recall one particular Alliance War where my team, despite being slightly outmatched in raw power, managed to secure a decisive victory against a much stronger rival simply because our hero synergies were impeccable, and our tactical execution was flawless. It felt like playing a grand chess match and seeing every piece move exactly as intended. These are the moments that validate all the hours spent researching, experimenting, and refining. It’s not just a win; it’s a testament to your strategic thinking and your understanding of the game’s intricate mechanics. That surge of satisfaction, knowing you outsmarted your opponent through sheer strategic brilliance, is what keeps me coming back for more, constantly striving to perfect my game and lead my armies to even greater glories in the zombie apocalypse!
Wrapping Things Up
And there you have it, fellow commanders! We’ve journeyed through the intricate world of hero synergy, from understanding individual roles to mastering the ever-shifting meta. I truly hope that diving into these strategies has opened your eyes to new possibilities and given you the confidence to fine-tune your own armies. Remember, Age of Z isn’t just about collecting the strongest heroes; it’s about crafting a cohesive, intelligent force where every single unit contributes to a grander tactical vision. It’s an ongoing learning process, a thrilling dance between analysis and execution, and honestly, that’s what makes this game so incredibly addictive and rewarding. So, go forth, apply these insights, and watch your victories multiply!
Useful Information to Know
1. Don’t Overlook Commander Skills: Many players get so caught up in hero abilities that they forget their commander’s unique skill tree and specializations are paramount. These aren’t just minor buffs; they can be the foundational element around which your entire team should be built. For instance, a commander specializing in vehicle damage might make even an average vehicle hero outperform a top-tier infantry hero if the latter doesn’t receive those crucial commander boosts. Always check your commander’s active and passive skills and ensure your primary combat heroes directly benefit from them. It’s a fundamental alignment that can dramatically shift your overall power curve and save you countless resources by avoiding mismatched investments. This principle has been a game-changer for my own progression, allowing me to consistently punch above my weight class by ensuring every hero chosen is perfectly aligned with my leader’s inherent strengths, turning what might seem like minor stat increases into significant battlefield advantages.
2. The Power of ‘Niche’ Heroes: While everyone chases the meta’s top-tier damage dealers and tanks, some “niche” heroes, often overlooked, can become absolute game-changers in specific scenarios. These might be heroes with unique crowd control abilities, specific debuffs that cripple certain enemy types, or even support heroes whose healing or buff-cleansing capabilities are unparalleled in long-drawn-out battles. I’ve personally seen a low-tier hero, when strategically deployed and properly leveled for their unique utility, completely turn the tide against a seemingly superior opponent. Don’t instantly dismiss a hero just because they aren’t labeled “S-tier” in a generic tier list. Explore their unique skills, envision scenarios where those skills would be invaluable, and consider investing in a few specialized heroes for those tricky situations that your main team might struggle with. They often provide the tactical flexibility needed to overcome unexpected challenges and keep your opponents guessing.
3. Active Alliance Engagement is Key: Your personal hero strategy is crucial, but your success in Age of Z is deeply intertwined with your alliance. An active, communicative alliance offers invaluable support through resource trading, rapid reinforcement during attacks, and crucial strategic advice. Many top-tier alliances have dedicated members who analyze new heroes, test formations, and share optimal strategies, effectively giving you access to collective expertise. I’ve learned more from discussing hero pairings and counter-strategies with my alliance mates than from almost any other source. Furthermore, active participation in alliance events yields significant rewards, including hero shards and advanced materials, which are essential for powering up your roster. Don’t be a lone wolf; engage with your alliance, contribute to the discussions, and leverage the collective brainpower and resources to accelerate your growth and dominate the battlefield as a united force. It’s a community-driven game, and those who embrace that aspect thrive.
4. Resource Hoarding vs. Strategic Spending: It’s a delicate balance, isn’t it? On one hand, you want to save resources for major events or new, powerful heroes. On the other, hoarding too much means you’re not strengthening your current team, leaving you vulnerable. My personal philosophy has evolved to be one of “strategic spending.” This means identifying your core 5-7 heroes and ensuring they are consistently leveled, skilled, and geared up. For other heroes, I only invest when I have a clear plan for their integration into a synergistic team or if they offer a specific counter for a recurring threat. Avoid the temptation to spread your resources thinly across many heroes; a few fully optimized heroes will always outperform a dozen mediocre ones. Think of it like investing in a stock market: focus your capital on proven performers and promising, high-impact opportunities, rather than diversifying so widely that none of your investments truly grow. This disciplined approach to resource management is vital for sustained growth and allows you to always have a competitive edge.
5. Never Stop Learning & Experimenting: The meta in Age of Z is a constantly shifting landscape. New heroes are introduced, existing ones are rebalanced, and players develop innovative strategies. What works today might be less effective tomorrow. The biggest mistake you can make is to become complacent with your current hero lineup and strategy. Always stay curious! Actively seek out information on patch notes, engage in community discussions, watch top players, and most importantly, be willing to experiment yourself. Use those simulation tools to test new ideas without penalty, and don’t be afraid to try unconventional pairings. I’ve discovered some of my most powerful team compositions by simply trying something totally out of the box after a string of defeats forced me to rethink. The moment you stop learning and adapting, you start falling behind. Embrace the dynamic nature of the game, view every challenge as an opportunity to refine your approach, and you’ll maintain your edge against all foes.
Key Takeaways
Mastering Age of Z isn’t just about raw power; it’s about intelligent synergy, strategic resource allocation, and a willingness to continuously adapt. Remember to build your teams with cohesion in mind, ensuring hero roles complement each other and align with your commander’s strengths. Don’t be swayed solely by a hero’s “power” number; true strength comes from how well your units work together. Actively research the evolving meta, utilize pre-battle simulation tools to refine your strategies, and never shy away from experimenting with new combinations. Investing wisely in your core heroes and making calculated decisions about new recruits will save you invaluable time and resources in the long run. Most importantly, embrace the journey of learning from both your triumphs and your setbacks. The commanders who consistently achieve victory are those who remain flexible, informed, and always eager to optimize their approach to the ever-present challenges of the apocalypse.
Frequently Asked Questions (FAQ) 📖
Q: Alright, so with dozens of heroes popping up, each with their own fancy skills, how do I even begin to build a truly effective team that actually works together instead of just a bunch of strong individuals? I feel like I’m just throwing darts sometimes!
A: Oh, trust me, I’ve been exactly there! It’s like trying to cook a gourmet meal with a fridge full of random ingredients – you need a recipe, right? For me, the game-changer was stepping back and thinking about roles.
Every hero, even the most powerful ones, needs buddies who complement them. You generally want a good mix of damage dealers, someone who can soak up damage (a solid tank), and a hero or two who can offer support, like healing, debuffs on enemies, or buffs for your own crew.
Personally, I found huge success by first identifying my main damage source – maybe a killer shooter hero – and then building around them. Who protects them?
Who makes their attacks even stronger? Don’t just look at their power number; dive into their active and passive skills. Does their skill reduce enemy defense, making your main attacker hit harder?
Bingo! And honestly, experimenting in lower-stakes battles before you commit precious resources to a full upgrade can save you so much heartache. I learned that the hard way, pouring everything into a hero I thought was great, only to realize they just didn’t ‘click’ with my other units.
Think of it like building a sports team; you can have individual stars, but if they don’t pass the ball to each other, you’re going to lose.
Q: I keep hearing about the “meta” and how certain heroes are “S-tier” or “must-haves.” Is it always about chasing the latest, most popular heroes, or can I still be competitive with my favorites?
A: That’s such a brilliant question because it’s something I wrestled with for ages! The “meta” can feel like this intimidating, constantly shifting beast, right?
And yeah, sometimes there are heroes that just dominate for a patch or two. But here’s the thing I truly believe after all my time in the trenches: blindly chasing the meta can actually hurt you.
Why? Because resources are finite! If you’re constantly swapping heroes, you’re spreading your upgrade materials thin, and you end up with a roster of decent heroes instead of a few unbeatable ones.
I tried the “chase the meta” approach early on, and all it did was leave me with a bunch of half-upgraded heroes and feeling perpetually behind. What I learned is that understanding the meta is important – it tells you what other people are doing – but it’s even more crucial to understand why certain heroes are strong.
Then, you can either adapt your strategy to counter them or find your own unique combinations that excel. Sometimes, an “off-meta” hero, when maxed out and paired perfectly, can absolutely surprise and wreck an opponent who’s just relying on the latest popular pick.
It’s all about creating synergy with the heroes you have and mastering their specific strengths, not just copying what everyone else is doing.
Q: Okay, so I understand the importance of synergy, but how can I actually test out these hero combinations without wasting all my hard-earned upgrade materials and speed-ups? I can’t just throw everything at a new hero every time I have a bright idea!
A: This is probably the most common headache, and one I’ve personally felt countless times! It’s like wanting to test-drive a new car without actually buying it first, right?
You absolutely do not want to dump resources into a hero only to find they don’t quite fit your vision. What’s worked wonders for me, and for many seasoned players, is a multi-pronged approach.
First, always, always use any in-game trial features or mock battles you have. Even if the hero isn’t fully leveled or skilled, it gives you a feel for their mechanics.
Second, this might sound simple, but seriously, watch other players! Observe in alliance wars, watch YouTube content creators, or even check out streams.
Pay attention to the hero compositions they use and how they perform. You can learn so much by just observing what works (and what doesn’t!) for others.
And third, if you’re serious, diving into community forums and Discord servers is a goldmine. Many players have shared their experiences, theory-crafted, and even created unofficial simulators or spreadsheets that can give you a rough idea of how certain combinations might perform.
It’s not a perfect science, but by combining these methods, I’ve saved myself from so many costly mistakes and focused my resources on combinations that truly shine.
It’s about being smart and strategic before you go all-in!